
Creating a new instance of MEX for Testing
Let’s say you want to have another instance of MEX running whether it be for testing or setting up another site, but when you run the installer it asks you to remove the old instance on the same server.
Well you came to the right place, creating a new instance of MEX is quite easy but keep in mind that you will need the appropriate permissions and some knowledge on SQL and IIS management.
Create a test database in SQL
- Take a backup of the database in SQL management studio.
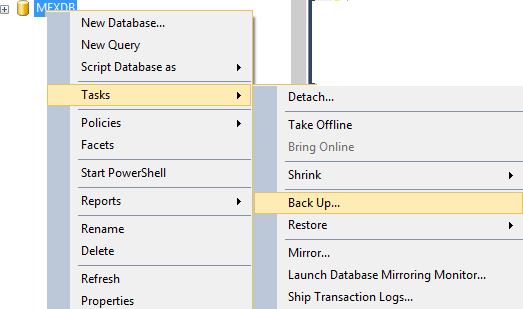
- Restore it on the same instance under a different database name.
Create a new Intranet Folder for the new Instance of MEX
Next, you will need to locate the mexdata folder on the server, this folder is usually saved in C:\inetpub\wwwroot folder.
- Copy and paste this folder in the same location and rename it “mextest” or something similar.
Setting up the Test Site in IIS
Open up IIS from the Control Panel -> Administrative Tools -> Internet Information Services (IIS) Manager. Once open, expand the Sites and expand Default Websites, where you should now see the new folder you created. This folder will be shown as a Folder and will need to be converted to an application.
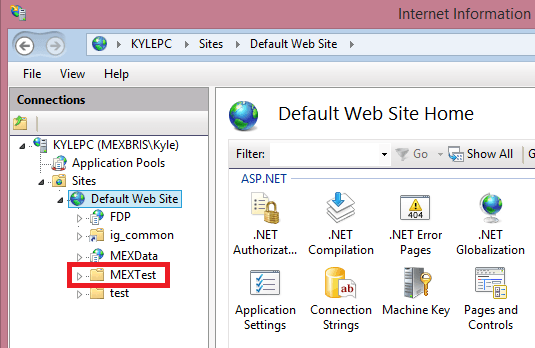
Newly created MEXTest Folder in IIS
What you want to do is create a new application pool for the new application you are about to convert the folder into.
Creating a New Application Pool
Firstly we will need a separate application pool to use to run the new site.
- To create a new one go to Application Pools.
- Right Mouse Click and select Add Application Pool.
- Give it a name - the same as the folder is always a good practice.
- Select the .NET version to be v4.0.3.
- Set the Managed pipeline mode as Integrated.
- Click Ok to save.

Add Application Pool Form
A new application pool should now be created. Before you can use this pool with a site the 32 bit application compatibility will need to be adjusted. To do this:
- Right Mouse click on the Application Pool.
- Set Enable 32-bit Applications to True.
- Click OK to save.
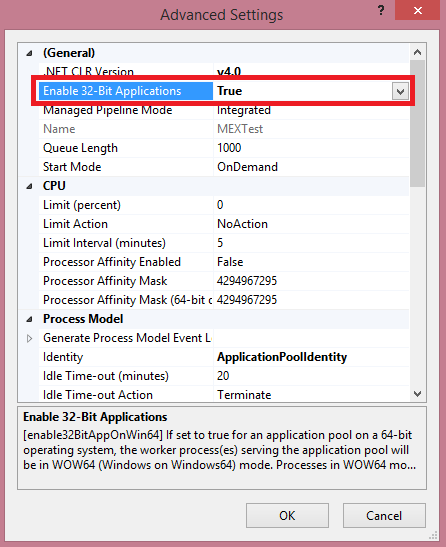
Enabling 32-Bit application settings
Converting the New Folder into an Application
We can now convert the new test site folder into an application. To do this:
- Find your new test folder under Default Websites.
- Right Mouse click it and select Convert to Application.
- Next to Application pool: click the Select button and assign the new application pool you just created to this site.
- Click OK to save.
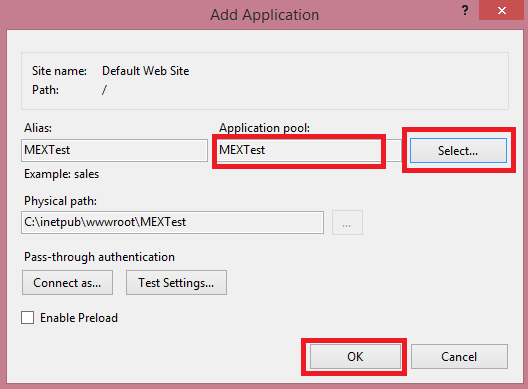
Adding the newly created application pool to your new site
There you go!
You have successfully created a new testing site for MEX, or a new application.
Changing the Connection Strings
In order to connect to the new database you created earlier you will need to change the connection strings of the site. To do this:
- Go to the Connection Strings.
- Change the Bolt_Entities and the MEXEntities to the test database you created at the start and you are done.
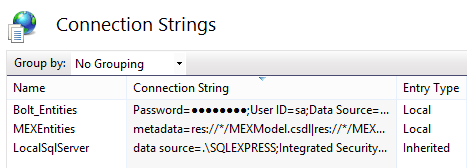
Changing the Connection Strings
Test Licensing Issues
Because you are duplicating the live MEX System, you will have issues connecting the new database as this is seen as a duplicated database. This is not an error but a security measure that we have put in place for obvious reasons.
Simply contact our support team and request a Test user to be set up for you to register your database for testing.
Need Help With This?
For more information or help with this, contact the MEX Maintenance Software Support team at support@mex.com.au or call +61 7 3392 4777