
Applying Manual Update Files in MEX 15
As with any other software application, updates are made available by the MEX team to apply bug fixes and introduce enhancements to the application.
There are times where a user may not be able to update their version of MEX due to network security settings, where your server may be unable to reach the MEX Update service, perhaps because a firewall or proxy is blocking the connection. In other instances, when customers have strict change control procedures, they would prefer to control which build of MEX they upgrade to, and when.
In most cases, MEX Manual Updates can be applied from any machine running MEX, although in some cases it’s simpler to apply the update straight from your MEX application server.
Where to get MEX manual update files
To acquire the manual update files, first contact MEX Support. Note that you’ll require a valid maintenance agreement in order to receive the update files. MEX Support will then transfer the files, generally by MEX’s FTP server, in zip archive format. Do note that these files do not need to be unzipped before applied, as MEX can handle the files in their current format. Once you’ve received these files, save them to a location on your computer.

Applying the Manual Updates
To apply these in MEX, you will firstly need to log in as an account with access to the Control Files module.
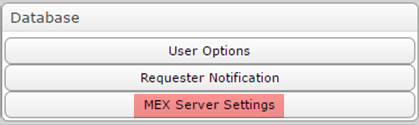
- From the MEX Main Menu, select ‘Control Files’;
- In the top right-hand corner, under the ‘Database’ grouping, select ‘MEX Server Settings’.
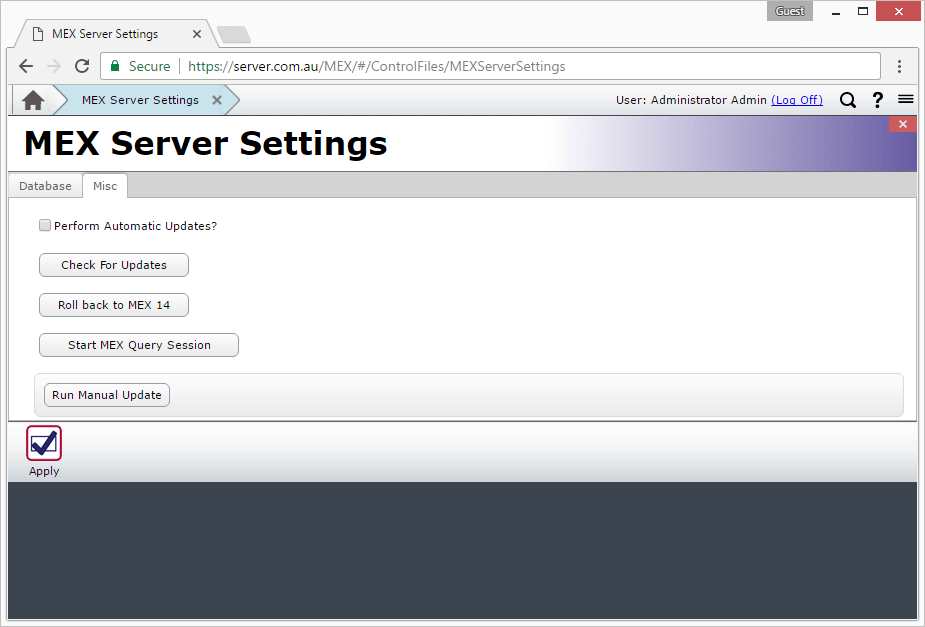
- In this screen, on the ‘Misc’ tab, you’ll see an option that says ‘Run Manual Update’. This will open up a file browser window, where you can navigate to the location that you have saved the manual update files. (Please make sure that you only select one update package at a time to be applied, e.g. if you are updating from Build 61 to 64, you will have to apply Builds 62, 63 and 64 in that order.)
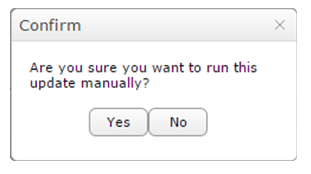
- Once you have selected the file, it will then upload, and you will receive a confirmation message asking if you would like to continue with the upgrade.
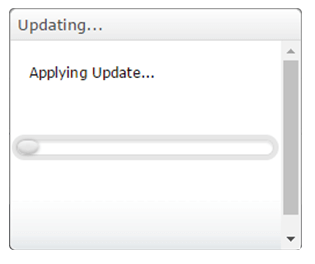
- Once you click ‘Yes’, it will display a loading bar advising that it is applying the update.
- After the update has completed loading, you will receive a confirmation message. Select ‘OK’ in order to restart your MEX instance.
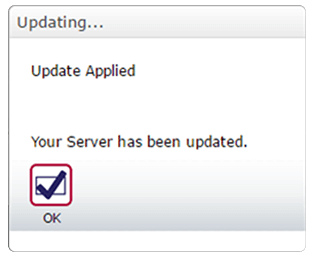
Please note that after selecting ‘OK’, the system may take up to a minute to load again, as it is pulling down the newly updated files from the server.
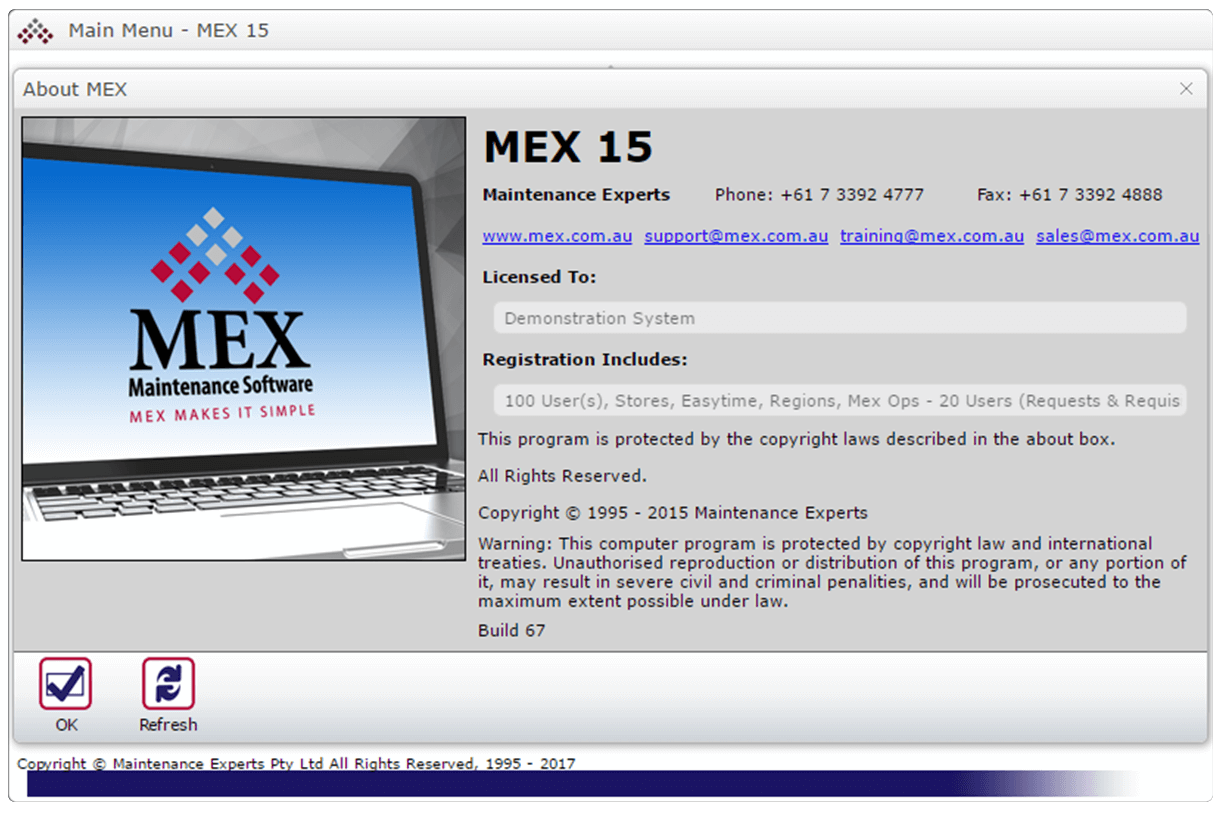
From this point, log back in and confirm that the build has been applied by checking the ‘About MEX’ screen from the menu on the top right-hand side of the screen. The build number will be down the bottom of the window;
If you experience any difficulty with the above steps, or you don’t think the update has worked correctly, please contact MEX Support to assist at support@mex.com.au or call +61 7 3392 4777.