
Importing Data into MEX V15
Another new feature of MEX V15 is the ability to Import data from within the main MEX interface. In this article we’re going to take you through the process of importing data directly into MEX using this functionality.
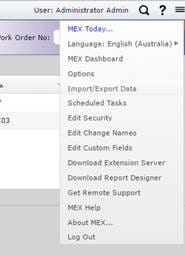
- Begin by selecting the ‘Import/Export Data’ option from the Menu button in the top right hand corner of MEX
NB: While creating and modifying export functions is a relatively simple programming job for anyone with the required skills and some familiarity with the MEX database, if you require a customized import function your best course is likely to be to contact MEX to perform the custom work for you.
The Import/Export Data screen has an Import tab from which the various Import functions can be accessed. Each of the MEX Imports functions in the same way, but in this example we’re going to import Assets into the database.
- Firstly, we’re going to populate the Excel import template for the type of record that we are importing.
- A copy of the import template can be downloaded by clicking on the "Template" hyper-link for the import.
- You can also access a completed example of a filled in template using the "Sample" hyper-link to compare and validate if you are on the right track with your import.
It is important to note:
- When you are filling out the template the column headings must remain unchanged – and;
- You cannot rename any of the columns in the spreadsheet or add or remove columns from the template.
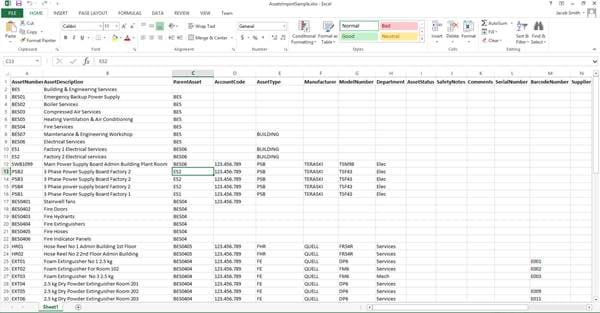
Now in the Template file in Excel:
- Populate the fields with your desired Asset Numbers and Asset Descriptions. As within MEX, these are your bare minimum requirements for creation of an Asset.
- Feel free to populate as much of the other fields as are applicate, just as you would when creating an Asset manually.
(For more information about what fields are mandatory when importing, refer to the help guide section, ‘Importing and Exporting Data’, where there are tables available that detail this information.)
It should be noted that when importing into the Asset Register, if you are updating an existing record and any cell in the template is left blank then the field in MEX will remain unchanged. For example if you have left the Serial Number field blank in your template for an asset that has a Serial Number in MEX, then the Assets Serial Number will remain populated with the original value after the import has been processed.
- Once you are happy, save the file somewhere with a meaningful name and prepare to import.
- It is wise to back up your database before doing a significantly large import (e.g. adding an entire site to your Asset Register), in the event that you are not happy with the results.
If you require assistance creating a backup, contact your IT services – or if you are a hosted customer, contact MEX Support.
- To begin the import process, click on the "Import" button for the relevant import function.
- This will open up a file browser for you to select your completed import template.
- After you have selected a valid file, a pop-up will be displayed asking you to confirm the import.
- Click on "Yes" to continue.
Prior to the import being processed the spreadsheet will be validated by the system. If any of the records are invalid for any reason you will be advised and given the option of either cancelling the import or proceeding. If you proceed with the import then any invalid records will not be imported. You can see the reasons for any records failure to validate by clicking on the "More Info" hyper-link as shown below.
At the end of the import process you will be advised of any issue with the import.
In the event that you import information that requires an addition to the MEX Control Files then this addition will be made automatically. For example if you are importing records into the Asset Register and you specify an Asset Type that does not yet exist in the Asset Types Control File, then the import process will automatically add the new Asset Type to the Control File. This means that you should take care with the spelling of any information in your spreadsheet that relates to a drop-down in MEX, as to not create a duplicate value (e.g. ‘Forklifts’ vs ‘Fork lifts’).
If you have any question or need our help please contact the MEX support team at support@mex.com.au or call +61 7 3392 4777.
If you find that there are no templates for some of the items you want to import, please be aware that you will need to discuss these with our sales team. They can be contacted on email at sales@mex.com.au