Limiting What Users See in MEX Using Security
Have you ever wanted to limit what users can see and do in MEX?
Well you can, just by using MEX security to lock down the area of MEX that you do not need them to see or use. In the MEX Maintenance Software, security is applied for three main reasons:
- To prevent users from making unauthorised data changes.
- To simplify the system by removing unnecessary screens, fields and functions. Thereby reducing the training requirements for your end users.
- Setting key fields as mandatory. This ensures that fields critical to your reporting must be filled in by users.
Security permissions are applied to groups of users in MEX and these permissions dictate what each group can see and do when the users assigned to them are logged into MEX. You can create these groups from the Security Groups button located on the bottom right of the Security Setup Screen.
Security permissions can either be set on:
- An entire screen: Users are allowed or not allowed access to an entire screen.
- An individual control on a screen: Individual fields, drop-downs and buttons can be affected. For example, a button can be disabled; a field can be read-only and so on.
Setting Security Permissions - Edit Mode
With the July build release of MEX 15, the new tool aptly named Edit Mode allows you to easily setup and edit security on the fly from any page within MEX. For more information on this new tool and all features it offers outside of just security permissions, you can read more on the Edit Mode information page.
For older versions of MEX, or as an alternative to Edit Mode, please refer to Setting Security Permissions – Security Setup below.
Accessing Edit Mode
To access Edit Mode from any page:
- Click the Hamburger menu in the top right of MEX
- Scroll down and click Edit Mode
- This will open up the Edit Mode menu – which appears as a floating form over your current MEX page
- This is a floating menu that will sit above all lists and forms within MEX and can be moved in any direction as you will
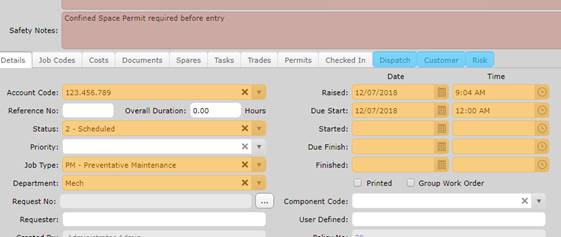
The Edit Mode menu, floating above a WO Detail form
Editing Security
In order to begin editing security on the fly, you simply need to navigate to the area in MEX you would like to set security on and open the Edit Mode menu.
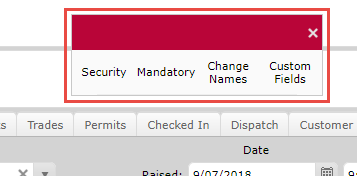
- Start by clicking Security in the Edit Mode Menu
- Select the Security Group that these changes will be applied to
- If you are adding a new Security Group, select the plus symbol next to the drop down, and fill out the Security Group form that appears.
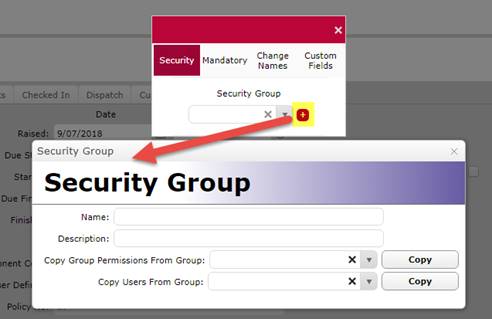
Adding a new Security Group
- Once a Security Group is selected, four options will be made available to you
- Clear: Removes any security applied
- Set Not Visible: Removes the content from being seen by a user
- Set Disabled: Content is visible but cannot be interacted with in any way
- Set Read Only: Content is visible, and relevant content can be highlighted to copy information, but cannot be changed

The four security options of Edit Mode
From this point, you can select one of the four security options, then individually click elements, or hold down the left mouse button to drag a box over several elements in order to apply security.

Security Settings applied to separate form elements
Once the security is setup how you see fit, simply closing Edit Mode will make sure that this new security is applied to that security group. Reopening Edit Mode with this security group selected will continue to show your settings, making it easier to keep track of which security you have applied to which specific elements.
Through Edit Mode, applying security becomes a whole lot smoother, in both assigning securities quickly to multiple groups and keeping track of who had security applied to which areas.
Setting Security Permissions – Security Setup
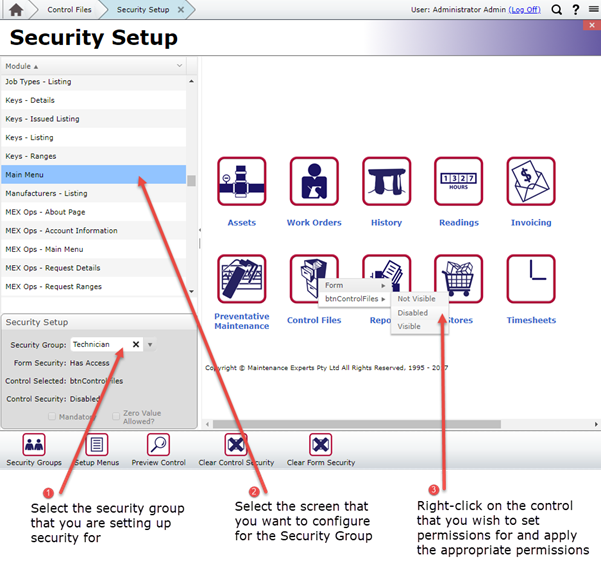
Any new or existing Security Group can have its permissions modified in the Security Setup screen.
The basic operation of the Security Setup screen happens in three steps:
- Select the User Group to be edited from the Security Group drop-down located in the bottom left-hand corner of the screen
- Select the screen or report that you want to change access for from the listing on the left-hand pane of the screen
- Apply the permission to the screen or the control on the right-hand pane of the screen
As an example, the "Technician" Security Group is not to have access to Control Files. The most effective way of doing this would be to disable the appropriate button on the Main Menu. To achieve this you would perform the following steps:
- Select the "Technician" Security Group from the drop-down located in the bottom left-hand corner of the screen
- Locate the Main Menu screen from the listing on the left-hand side of the screen. This listing includes all screens found in MEX. The selected screen will be displayed on the right-hand pane
- Go to the displayed screen on the right and right-click Control that you wish to set permissions for (in this case the "Control Files" button).
- This brings up the Control’s "Permissions Menu"
Applying Permissions to a Control in MEX
- In the Permissions Menu there are two options available for selection; Form and Control.
- If you select the "Form" option, then you will be editing the permission for the entire screen and will be able to select either "No Access" or "Has Access". If "No Access" is selected then the user will be unable to open the form.
- If you select the Control, then the options available for selection will depend upon what kind of Control you are applying permissions to:
| Control Type | Permissions Available for Selection |
|---|---|
| Button |
Not Visible, Disabled, Visible |
| Field |
No Access, Disabled, Read Only, Read/Write |
| Label (Static Text) |
Visible, Not Visible |
| Date |
No Access, Disabled, Read Only, Read/Write |
| Check Box |
No Access, Disabled, Read/Write |
- Select a permission for the Control. In this case, we will grey out the button by selecting "Disabled". If "Not Visible" is selected then the button would be hidden from the user
The effects of a permission upon a Control are as follows:
| Permission | Effect of Permission |
|---|---|
| Not Visible |
Removed from the screen. |
| No Access |
Removed from the screen. |
| Visible |
Full access |
| Disabled |
Greyed out on the screen. User can see but not use. |
| Read Only |
The user cannot edit the contents of the field. |
| Read/Write |
Full access. |
Previewing Your Changes
Having applied security to a Form or Control, the effects of the change may be viewed by clicking on the "Preview Control" button located in the bottom left-hand corner of the screen. This will pop-up the edited screen with your Security Group applied to it so that your changes may be assessed.
Undoing Your Changes
If you would like to return a permission to the default setting for a Security Group, then select the Control in the right-hand pane and click on the "Clear Control Security" button located in the bottom left-hand corner of the screen.
TIP: When you deny access to a Control, you should consider other ways a user might access that function. For example if you do not wish users of a Security Group to close of Work Orders then you would disable the "Close W/O" button in the Work Order Listing. However, you would also need to disable the "Close W/O" button in the Work Order Details screen.
For more information or help with this, contact the MEX Support team at support@mex.com.au or call +61 7 3392 4777
For more information see our Edit Mode information page: