Using the New MEX Notifications
Notifications allow users to be alerted whenever a record is created, cancelled or closed. Records like Requests, Work Orders, Purchase Orders, etc...When these records need to be approved or someone has actioned a line. MEX Notifications have now been improved to allow for even more information to be sent out to users, keeping them more informed than ever before. Best of all, users can go through each notification and specify conditions and filter exactly what notification is sent out from MEX.
All notifications are set up on a per user basis but need an SMTP server in order to deliver these emails. To start with, let’s make sure the notification settings are set for your users.
SMTP Notification Settings
Go to the Click the MEX Hamburger menu -> Options -> Notifications and let’s configure your settings.
If this form is left blank, MEX will use its own notification service. If you wish to use your own service then user-specific email settings can be set in the Notifications tab of the User Options. If you do not know this, please contact your IT Support to confirm the email account settings.
If you want to use your own we need to tell MEX what details it needs to use to deliver notifications. These are:
- SMTP server
- Whether or not your system uses SSL
- SMTP Username
- SMTP Password
- From Address
Quite often these settings are the same for each user. To save time we have included the functionality to apply the notification setting you nominate to all users.
To do this, use the multi-update function available in the User options. Simply click the Set For All button and whatever settings you have filled in will be applied to all your users.
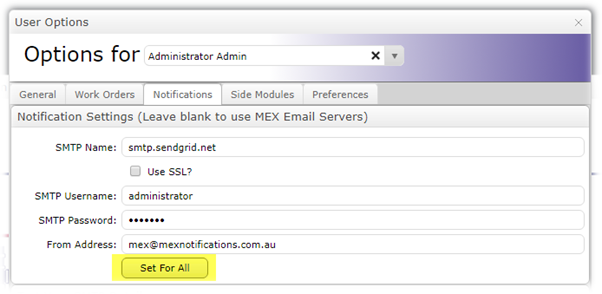
The Set For All button in the Notifications Options
There is one catch, not everyone should be able to do this as this setting will change all your user’s notification settings. Because of this, we do recommend that security be applied to this button for any user who you feel should not have access to it.
User Specific Notification Features
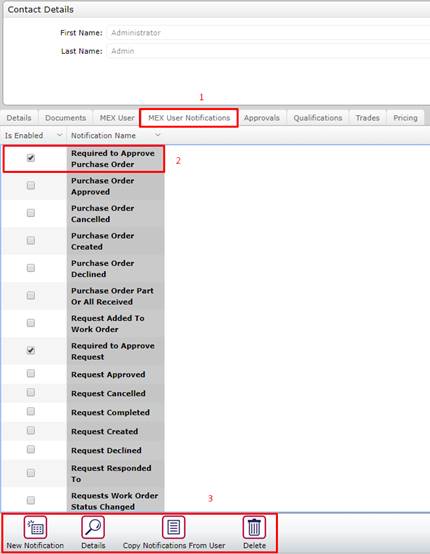
Each user can tailor what notificatin they recieve. You can access this configuration area by going to the Control Files -> Security Users -> Open a particular user and click the MEX Notifications tab. Here is an example:

Let’s run through this image
- The MEX User Notifications Tab is now the container for all Notifications.
- This is a list of notifications per user. All the Notifications that were in MEX before this build are now included in this list by default. You can choose which notifications are enabled and disabled for each user from here.
- There are now more options for what you can do with notifications which is shown by these buttons.
- New Notification: This is where you go to create a new notification for this user.
- Details: This is to view the details of the selected notification.
- Copy Notifications From User: This is for when you have a notification that is close to what you want but needs to be modified but you still want the original notifications to stay as such.
- Delete: This is to delete notifications that you no longer need for this user.
When you go to create a new notification, you will be greeted with a form that looks like this.
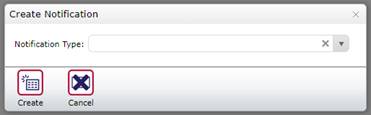
This is where you select what type of notification you are trying to create, such as when a ‘Work Order is Created’. You can only have one notification type per notification. After choosing you notification type and pressing the create button, you will be greeted with one of two different forms.
- If you try to create a new notification using a notification type that is already in yourlist, then this message will show up.
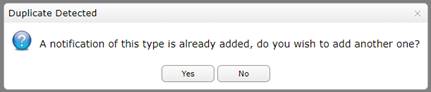
If you’re creating a notification that has different settings from the original, then go ahead and press yes. Otherwise you should press no and re-configure your existing notification.
- If you are creating a notification type that isn’t in your list or you’ve pressed yes on the ‘Duplicate Detected’ form, you’ll be greeted with the Notification Creation form as seen below.
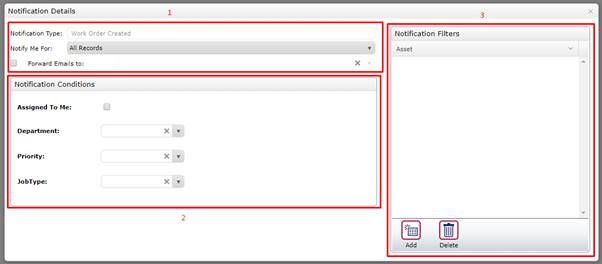
This form can be basically divided into three sections.
- General Notification Settings
- Notification Conditions
- Notification Filters
There are two sections in the General Notifications Settings that can be changed
- Notify me for: This is where you choose if you want to receive notifications based on other user’s work, your own work or everything.
- Forward Emails to: This is for when you are unavailable, you can choose where any notifications that you receive go to instead.
Notification Conditions are based on the notification type you’ve selected. In this example, I’ve used ‘Work Orders Created’ so the conditions we can change as shown above. You can choose to specify which conditions you want met in order for a notification to be sent to you. In the example above, there are no conditions set so you will be receiving a notification no matter what department, priority, JobType or its assignment.
The Notification Filters is where you can specify a more specific list that you want notifications to be dependent on. For instance, you could add a list of Assets to the filter above and you would only receive notifications for Work Orders raised with Assets in that list. Different Notification Types will give you different filters to filter by.
In redesigning our notifcations we also made them more customizable. You are now able to create notifications that can be either increased or decreased in scope depending on your needs. These settings are applied on per User basis from each account’s Contact Details page.
If you need a Notification that you cannot create, please feel free to contact MEX Support at support@mex.com.au or call +61 7 3392 4777 and they will help out however they can.