Adding Custom Fields to the MEX App
MEX has a number of customisation options allowing its users to capture even more information. Whether it is Changing Names, User Defined Fields, adding your own reports, custom KPI’s in the Dashboard or extra fields added to a form, the MEX Solution can be tailored to suit your needs.
Our range of New MEX Apps are no exception and also allow administrators to add customisations. Any custom fields created in the main MEX application become available for use in the mobile application. This has been designed this way to ensure both the main MEX and supporting mobile applications carry the same setup and in turn capture accurate data.
Tool Tip: Make sure you add the custom field in your main MEX application first before attempting to add the field to your mobile app.
When opening Edit Mode on the app you will be met with the following options:
- Security
- Mandatory
- Change Names
- Custom Fields
Do note that the Auditing option available in Main MEX is not available on the MEX Mobile application.

Change Names allows you to change any label on the application. This is not security group specific, but is a change that is applied to all users of your system.
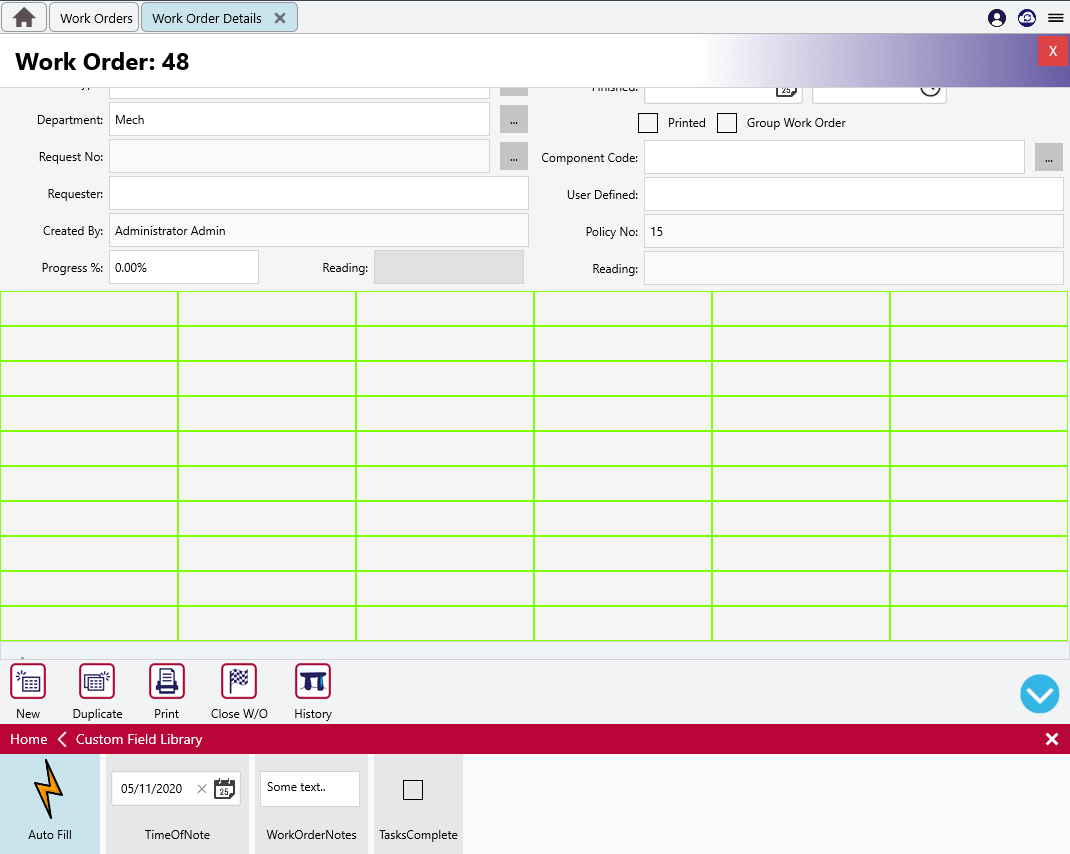
Custom Fields is where we will be focusing on in this tech tip. The Edit Mode interface is used to add the available fields onto the mobile application's screens. Just like Change Names, fields added here are applied to all users.
To start with, click the Custom Fields option and you will be presented with a list of all the custom fields that have already been added to this area within the main MEX application.
The second thing that it does is it adds a green grid onto the areas of the screen that you can add fields to.

Adding custom fields to the presented grid can be done by either:
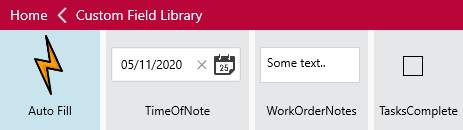
- Using the Auto Fill Option that automatically adds all your custom fields for this particular form/listing, just as they are in the browser-based version.
- Dragging and dropping each field onto the green grid.
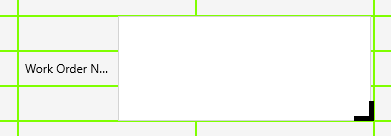
Once the fields are added, a black indicator appears on the bottom right-hand corner of a selected field. To resize it, you can tap and hold this corner and drag it out to size the field in that way.
If you made a mistake or want to see the details of a custom field, simply tap and hold on the field and you will be presented with the Details and Delete options.

Exiting the Custom Fields configuration area, you’ll see the field is fully operational. But to be safe it's always best to close out of that area and returning to it to freshen it up.
That’s pretty much it. Your App is now customised to match your main MEX applications setup.
For an in depth look into Edit Mode on the MEX App check out our tutorial linked below.
Securing the MEX App with Edit Mode